Oracle provides a lot of useful Oracle VirtualBox Pre-built Appliances.
In this blog post, I will describe the few extra steps I take after download in order to setup my lab environment on my work MacBook Pro.
- First step is download
- Secondly, I import the .ova file in Virtual Box
- Start the newly created VM and upgrade the Guest additions (this is described int he Oracle VirtualBox documentation)
- Check the Guest OS’s IP by issuing the command
ifconfig -a - Shutdown the VM
- In VirtualBox, select the VM, click Settings, Network, Adapter 1 (choose the one that is attached to NAT, if there is use of the adapter to attach a NAT):

- Click port forwarding and ensure that, at least the net8 and ssh port forwarding settings are set as in the picture:

- Go to ‘Shared folders’ and add the Mac’s home directory (in my case, it is /Users/radu.parvu) and check the box ‘Auto-mount’
- Go to ‘Display’ and set the Graphics Controller as VMSVGA. Do not enable 3D Acceleration
- Save the settings and start the VM
- In the shell on the host OS, ssh into the guest:
ssh -p 2222 oracle@localhost - In the host, start the Oracle SQL Developer
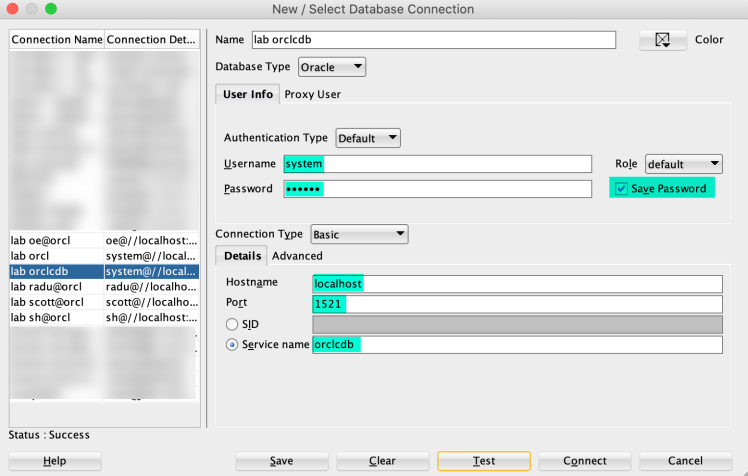
- Setup the connection to the container:
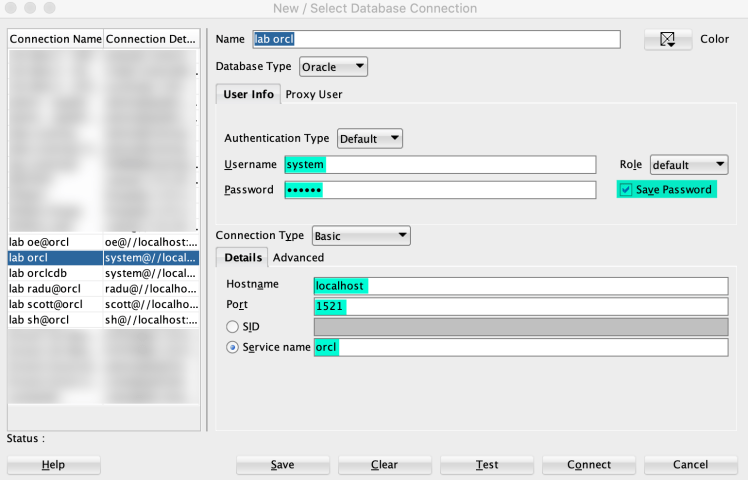
- Setup the connection to the pluggable database:
Steps tested with: VirtualBox Version 6.1.16 r140961 (Qt5.6.3)